![Kin Custom.png]](https://knowledge.kincustom.com/hs-fs/hubfs/Kin%20Custom.png?height=50&name=Kin%20Custom.png)
In order to create a color background for your products, please follow the step-by-step instructions below using your graphics editor of choice, such as Canva or Adobe PhotoShop:
- To apply a color background to your product, you will need to create a file using your graphics editor of choice. To do this, open your graphics editor and create a file with the correct dimensions for the product you would like to design.
*Don't know the dimensions for your product? Check out our Artwork Guidelines. - Once your dimensions are set, you can create a new file within your graphics editor. Make the entire artboard the color you wish to have as your background. Please make sure that Then, save the file as a .png.
When your design is ready to be uploaded into Creator Studio, follow these steps:
- Open your Creator Studio and log in.
- Once you are logged in, click 'Upload' to begin designing. View our Artwork Guidelines for information on file size requirements.
- Please review the "Wait! Before you get started designing..." pop up window and make sure you have followed the steps listed prior to moving on.
- Once you have reviewed the pop-up window, you can proceed in uploading the design you created in your graphics editor.
- Find your design and click 'Open.'
- Hover over your newly uploaded design and click the "Apply Design" icon.
- Select the product you'd like to design with and click the "Create Merch >" button.
- Your product will appear in the Mockup Generator click the "Mockup" button to review your product.
- To add a graphic or pattern over your product, do not click "Next" and instead continue with the steps below.
Adding a pattern overlay:
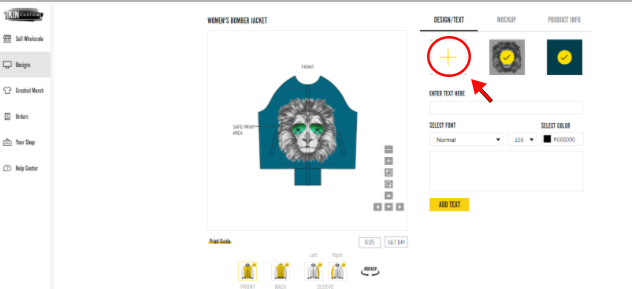
- Upload your pattern or graphic design of choice to your existing product by clicking the yellow plus sign icon. This icon will lead you to an upload prompt, where you will upload your desired design from your computer.
- Make adjustments, such as ensuring each panel of the product (front, back, sleeves and hood if applicable) is placed correctly using our adjustment panes and mockup button.
- Once your product has been thoroughly reviewed and is satisfactory, click Next.
You will then name your design and continue to the Profit Margin page within your Creator Studio!