![Kin Custom.png]](https://knowledge.kincustom.com/hs-fs/hubfs/Kin%20Custom.png?height=50&name=Kin%20Custom.png)
Preparing Your Designs
Once you've read How to Get Started, follow the steps below for best print quality and a great experience.
- Check out our Design Tips video below.
- Prepare your design to meet our artwork guidelines. If using all-over print, we suggest creating a seamless pattern in a design tool such as Photoshop, Canva or Illustrator for a seamless print before uploading into Creator Studio. We do not recommend uploading the same file inside Creator Studio to create a seamless design.
- View our disclaimers and print methods below.
| 0:07- 0:30 Safe Print Area | 1:46- 2:25 Change Background Color | 3:05- 3:45 Custom Branding |
| 0:31- 1:05 Use Full Bleed Images | 2:26- 2:48 Removing Backgrounds | 3:46- 4:04 What Color Scale to Use |
| 1:06- 1:45 DPI Instructions | 2:49- 3:04 Shadowing with DTG | 4:05- 4:44 Flyknit vs. Canvas |
Disclaimers
As a print on-demand company using sustainable business practices, it's important to understand the craftsmanship that goes into every handmade product. The disclaimers below will help guide you in what to expect when designing and receiving your merchandise.
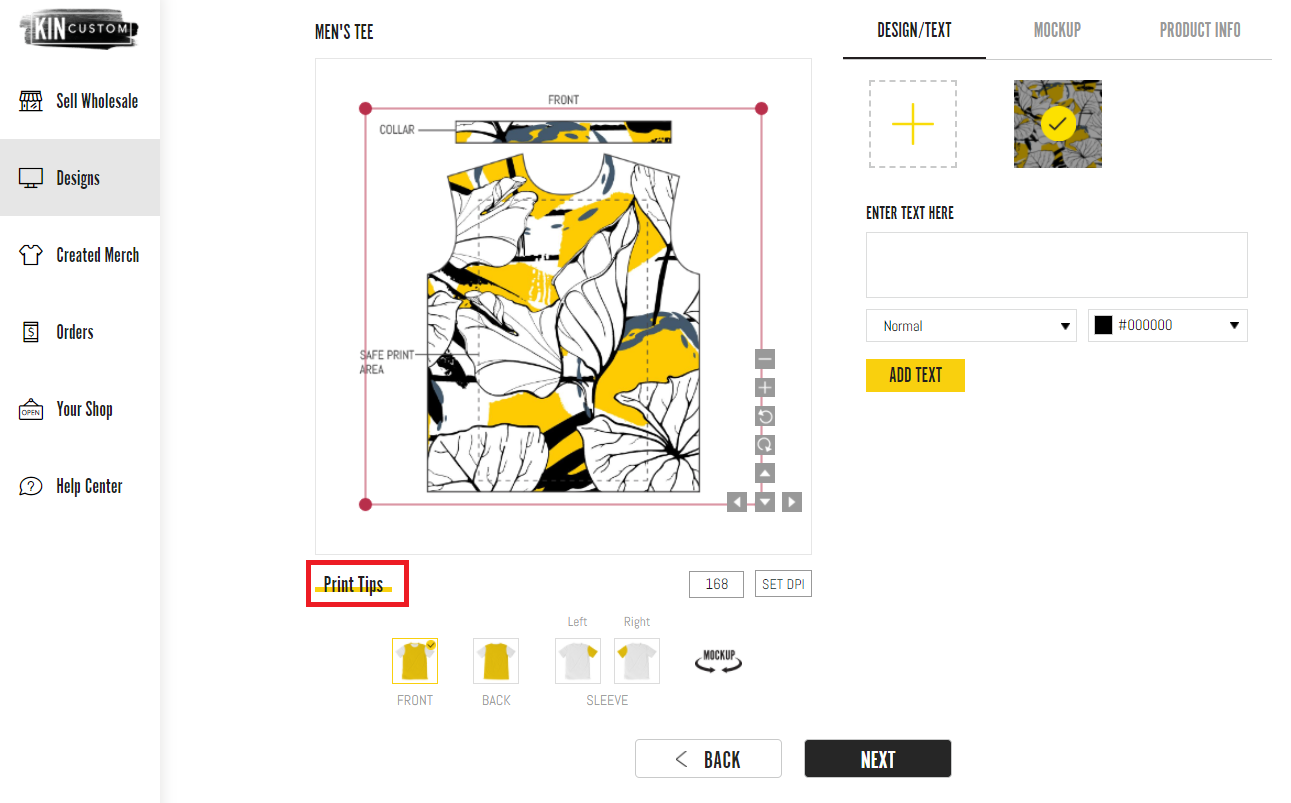
- Safe Print Area
Keep your design elements within this area. Pattern elements are actual representation of your finished product, not a mockup. Text or graphics outside of this may not appear on the final product once sewn. - Use Full-Bleed Images
For all-over print, use full-bleed images that span across each end of the pattern. If your all-over print design does not span across, space left will show the actual fabric. - DPI
When preparing your design file, you will need to make sure it meets the artwork guidelines. Please do not manually enlarge the DPI as print quality can be poor. If you do not have the correct resolution, we recommend using the right software such as Photoshop to make the desired changes. Designs using ink or watercolors are not recommended as the level of detail may not be able to be printed. - Print Color Variations
Due to different screen resolutions, materials and print methods, we cannot guarantee to color match each product. You may place a sample order to ensure products are printed to your liking. If there are exact color tones you wish to print, please convert your file to an RGB scale and make adjustments to your design file. Dark colors such as black are printed onto white raw materials. When printing a product primarily in a dark color (black), the color will not be as dark as you would typically have with black dyed material.
- Removing Backgrounds
We do not modify or remove backgrounds. For any blank space, your product will be the material color. Please use transparent PNG files for sublimation and UV and DTG will need to use transparent PNG files only, not semi-transparent. - Product & Model Mockups
The mockups we provide are to be used as an overall product visual to use at your discretion. Because our mockups are generated using internal technology, they are not able to replicate every exact detail as shown on a finished product. If using all-over print, we suggest creating a seamless pattern in a design tool such as Photoshop, Canva or Illustrator for a seamless print before uploading into Creator Studio. We do not recommend uploading the same file inside Creator Studio to create a seamless design. If you would like exact representation, we suggest making arrangements to use your own imagery. -
Minimum Line Thickness
If your design file contains very fine lines, please be sure to follow these guidelines. If the artwork contains lines with less than the minimum thickness, it may not be printed clearly on the final product.
-
We recommend using the color black if you wish to use a design with very fine lines. If using the color black, the lines of the design must be at a minimum thickness of .03cm
-
For lighter colors, such as gray and yellow, the lines of the design must have a minimum thickness of .1cm.
-
- Cut & Sewing
Because each item is handmade on-demand, it’s not possible to exactly align your design elements due to seam placement. Raw materials are purchased in batches and are as close to the original raw material as possible.- Apparel: Please allow for a 1" tolerance within each size. Thread color used is white thread for light prints, black thread for dark prints.
- Footwear: White thread and white shoe laces are only available, excludes Black Two-Tone Sneaker.
- Sublimation on Shoes
For shoes using sublimation, when stretched on ribbed or flyknit material may expose the white raw material. Lighter color prints are recommended instead of dark colors. - Product Branding
Please set-up custom branding in 'Settings' or all branding elements will be blank by default.
Print Methods
Each product uses a different print method due to its material. For specific print method by product, please click the 'Product Info' tab inside Creator Studio or click the product in our Product Selection!
- Sublimation
We print designs onto specialty paper and use heat to press the dye onto the garment. Sublimated print may appear more vibrant compared to DTG. - UV
UV printing is a form of digital printing using ultra-violet light to dry the ink instantly. When designing shoes with UV print method, it's recommended to use a light color design to avoid peeling. Natural movement of the foot may cause the print to peel in the creases of the shoe. - DTG
Using specialized ink jet printing technology, we apply ink directly to blank apparel. Because the product is printed onto the material, the color vibrancy may appear not as vibrant.